
Dhj . 07, 2024 00:43 Back to list
DIY Copper Wire Granulator A Comprehensive Guide
Copper wire recycling has become an increasingly popular venture for hobbyists and those looking to make a bit of extra cash while helping the environment. One of the most efficient methods for extracting copper from wires is through the use of a copper wire granulator. While commercial models can be expensive, creating a DIY copper wire granulator can be a rewarding project that pays off in both savings and sustainability.
Understanding the Basics
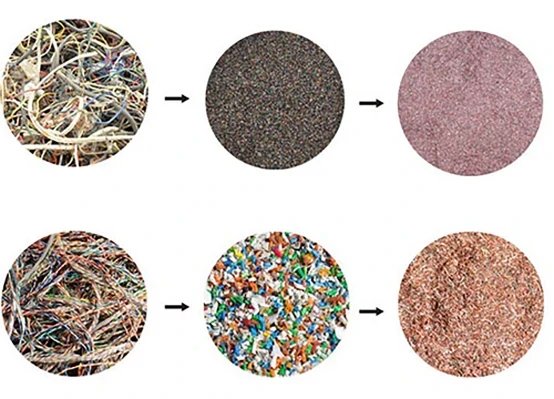
A copper wire granulator works by shredding the insulated wire and separating the copper from the plastic or rubber casing. This process not only allows for the recycling of high-purity copper but also reduces the volume of waste that would otherwise end up in landfills. For DIY enthusiasts, building a granulator offers the chance to customize the machine according to their needs and budget.
Materials Required
To build your own copper wire granulator, you will need some basic materials and tools
1. Motor A powerful motor is essential. A 2-3 HP electric motor should be sufficient to drive the machine. 2. Shredder Blades You can repurpose blades from old equipment or purchase them separately. Make sure they are sharp and robust enough to handle metal. 3. Frame Construct the frame from sturdy materials like steel or strong plastic. The frame should securely hold all components in place. 4. Wire Guide This will help feed the copper wire into the granulator efficiently. 5. Collection Bins You'll need bins to collect both the copper granules and the leftover plastic or rubber.
Building the Granulator
1. Frame Construction Start by building the frame. It should be stable and capable of supporting the motor and shredder blades. Make sure it has a secure base to prevent tipping during operation.
2. Installation of the Motor Mount the motor on the frame using brackets. Ensure it is positioned in a way that allows the mounting of the shredder blades above it.

3. Attaching the Shredder Blades Install the shredder blades onto the motor shaft. You may need to create an adapter to ensure a snug fit. The blades should be positioned to shred the wire as it passes through.
4. Creating the Wire Guide Build a guide where the copper wire can be fed into the machine. This can be made from metal or strong plastic and should direct the wire straight to the shredder.
5. Setting Up Collection Bins Position bins beneath the output of the granulator to capture the copper granules and plastic waste separately.
Testing and Safety Considerations
Once your granulator is assembled, it's time to test it out. Start with small amounts of wire to ensure that everything is functioning correctly. Pay close attention to the safety of your setup; wear protective gear such as gloves and goggles, and ensure that all moving parts are shielded to prevent accidents.
Maintenance and Tips
Regular maintenance is key to ensuring the longevity and efficiency of your copper wire granulator. Keep the blades sharp and clean the machine to prevent buildup of materials. Additionally, consider insulating the motor and other components from dust and debris by covering them when not in use.
Conclusion
Building a DIY copper wire granulator can be a fulfilling project that not only saves money but also promotes recycling and environmental responsibility. By utilizing waste materials effectively and extracting valuable copper, you can contribute positively to the green movement while cultivating a fun and productive hobby. Embrace the challenge, make improvements to your design over time, and enjoy the benefits of your efforts!
Latest news
Troubleshooting Common Eddy Separator Problems
NewsJul.04,2025
The Role of Metal Recycling Plants in Circular Economy
NewsJul.04,2025
The Impact of Recycling Line Pickers on Waste Management Costs
NewsJul.04,2025
Safety Features Every Metal Shredder Should Have
NewsJul.04,2025
How Industrial Shredders Improve Waste Management Systems
NewsJul.04,2025
How Cable Granulators Contribute to Sustainable Recycling
NewsJul.04,2025